Creating my own MTG token cards
I’m excited to share a new project I’m working on for fellow Magic: The Gathering fans, I’ve designed a set of six custom token cards, each available in both English and Japanese, to include as a special bonus with every order, these tokens feature a "deep under water" theme, with all the artwork created using AI to ensure a unique and cohesive look across the set.
Here's a preview of one card:

Tokens are a fun and practical part of MTG gameplay, I wanted to give something extra to players who support my shop, each order will come with one of these exclusive tokens, which you can use in your games or simply enjoy as a collectible, plus, every card will include a QR code linking directly to my homepage for easy access to updates and future releases.
All six tokens are available in both English and Japanese, making them accessible to a wider range of players, I chose a "deep under water" theme because I love the idea of mysterious and magical fish living in those depths, which also ties into my brand, Koi Fish Cards. My main goal was to mimic official MTG tokens as closely as possible, while also embracing a border-less card style that I personally enjoy.
Prepare Your Print
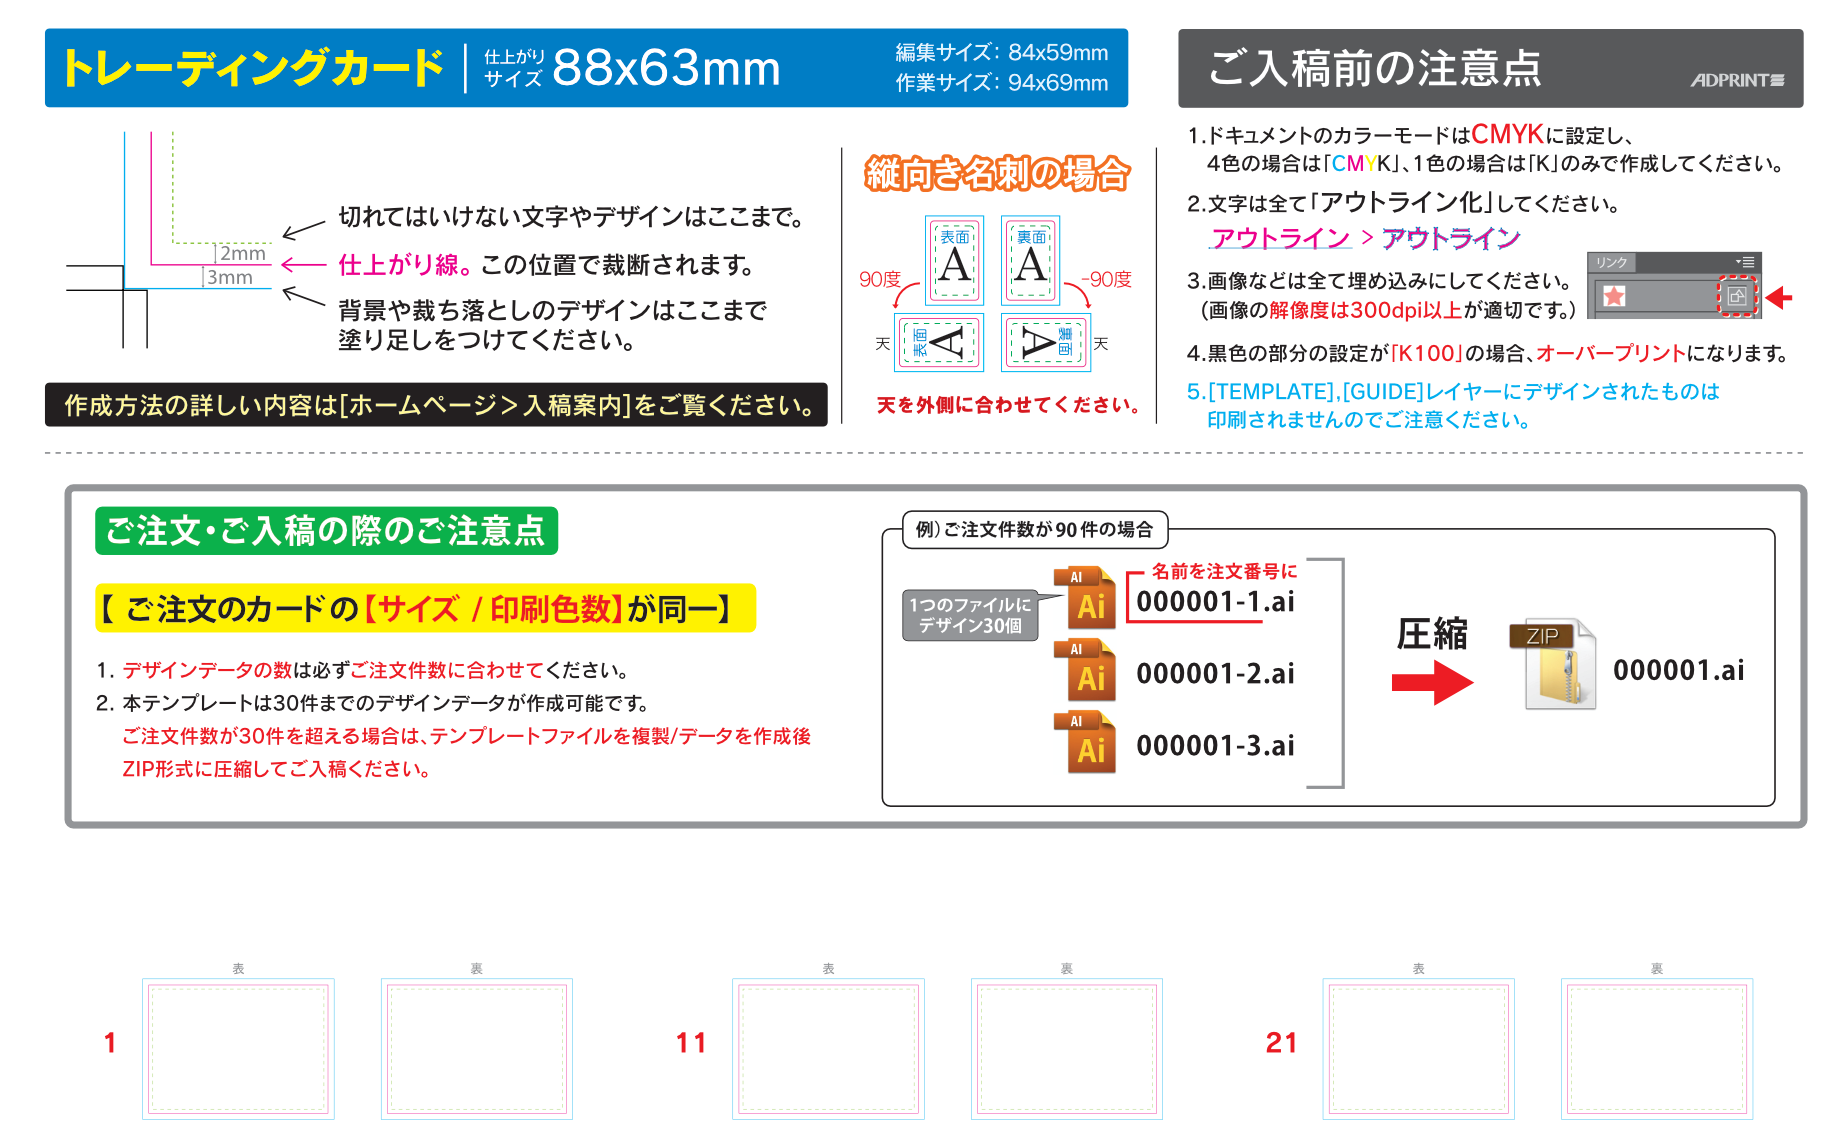
When you are ready to print your trading cards, start by searching online for companies that offer this service. Most printing companies will give you a template to use, but these templates can be a little different from one company to another. Usually, they are made for Adobe Illustrator, but you can use other programs like Affinity Designer, which is what I use, or GIMP.
One important step is to convert all your text to curves or outlines before you send your design to the printer. This makes sure your fonts will look the same, no matter what software the printer uses. Also, pay close attention to the guides in the template. In the example below, you will see three different colored borders:
- Green border: This is the safe area. Keep all important artwork and text inside this border so nothing gets cut off.
- Pink border: This is the cut line. The cards will be trimmed here.
- Blue border: This is the bleed area. Make sure your background artwork goes all the way to this border. Anything outside the pink border might be cut away, but having a bleed means you will not get any unwanted white edges.
Take a look at my token design with the guides visible.
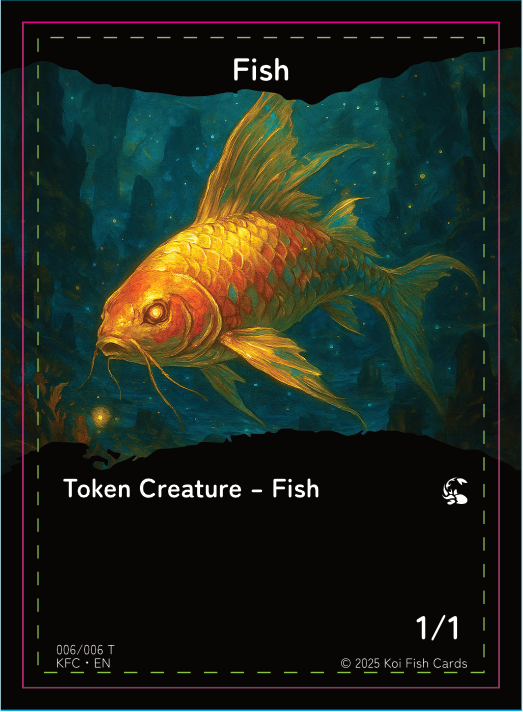
I keep all the important text inside the green border, so even if the cut is not perfect, everything stays readable. The artwork goes all the way to the blue border, so the card looks good even if the cut is a little off.
Why do these guides matter? It is common to see cards with cuts that are not perfectly centered, even with big games like Magic: The Gathering. This is why “centering” is important when grading cards. Sometimes, cards are misprinted in other ways, but those are rare and can even be valuable to collectors.
Where to Print Your Cards
Now that the designs are ready, I am still looking for a company in Japan that can print my tokens for a good price, without making me order thousands and thousands of cards. For my first print, I want about 1,000 cards. If you are also making custom cards, look for companies that allow small orders and have fair prices for smaller batches. They should be able to print high-quality trading cards. The goal is to match the feel and durability of official MTG tokens, with crisp images and sturdy cardstock.
Have you printed custom MTG tokens or trading cards in Japan, if so, which company did you use, and how was the quality, any tips for ensuring the colors and cardstock match official tokens, are there local print shops or online services you’d recommend for small-to-medium print runs, if you’ve tried printing with a QR code, did you run into any issues with scan quality?
I'll create additional blog posts featuring the token cards. Please let me know which one is your favorite.
Page updated: Jul 1, 2025
Page published: Jun 17, 2025